10.2 Starting the Browser
Our first step is to examine the "Setup" node:
- ActionExpand the Setup: Open Demo Page node now.

In the "Setup" node you'll see two child Sequence nodes:
- Set global variables dependent on OS - defines the global client variable used throughout the test suite and variables for the browser to be used dependent on the operating system (Chrome on Windows and macOS, Firefox on Linux).
- Start browser if necessary - starts the respective browser if it is already not running and loads the demo web page.
Let's also have a brief look inside the Sequence: Start browser if necessary:
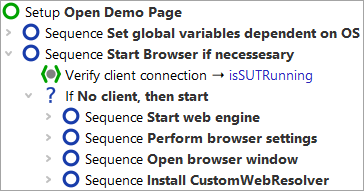
First you see a "Wait for client" node to double-check whether the client is already running. Only if it is not, it will be started.
The browser start itself happens in four steps:
- Start web engine - starts the browser process to allow configuration.
- Perform browser settings - configure the browser (e.g. cache, cookies, proxy settings, ...).
- Open browser window - open the browser window and wait for the web page to be loaded.
- Install CustomWebResolver - configure component mapping, so QF-Test will recognize the functionality of components (text field, button, data table etc). Section Web Component Recognition explains the reasons why this is advisable, along with information on the configuration.
These four steps are automatically generated when you use the Quickstart Wizard, that will be explained in the next tutorial chapter 11.
At this point, we're ready to actually start the Browser:
-
ActionClick on the
 Setup: Open Demo Page" so it is selected but still expanded (the
child nodes stay visible).
Setup: Open Demo Page" so it is selected but still expanded (the
child nodes stay visible).
-
Click the
 Start test run
toolbar button. This button causes the selected node to be executed.
Start test run
toolbar button. This button causes the selected node to be executed.
During execution QF-Test marks the active step by use of an arrow pointer "->".
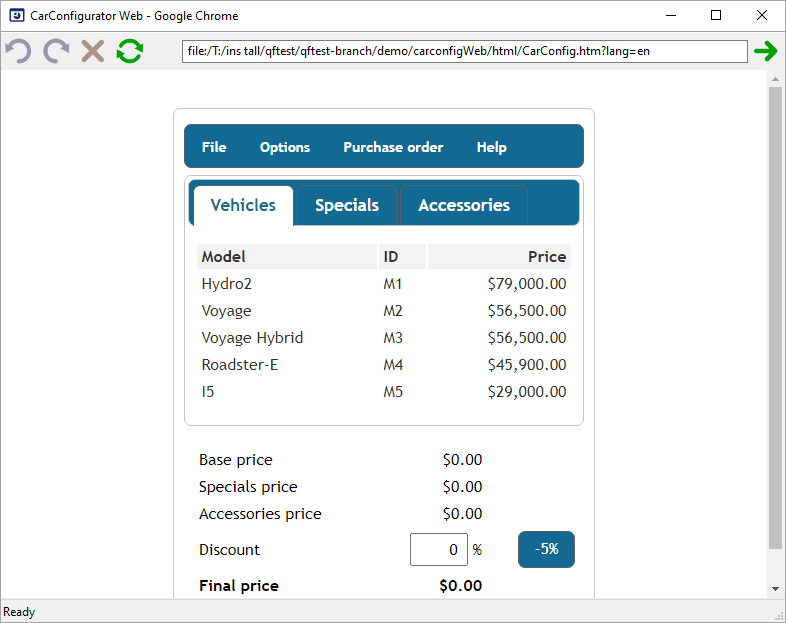
When the setup sequence is completed, the browser with the "CarConfigurator" demo page is going appear on the screen.